CAR & TRUCK GRAPHIC DECALS & WRAPS INSTALLATION INSTRUCTIONS
Video Guide for Dry Installations (Full Color Decals):
Oracal 3951g Boat Wrap Installation Guide:
Vehicle Wrap Installation Guide by Oracal:
Boat Decal Installation Video Guide by : Bald Eagle Fishing Adventures:
Car Decals Easy Installation 8 Step Guide for the Oracal Vinyl with Rapid air ( Dry method)
Not sure how to apply your new vehicle vinyl graphic? Follow these application instructions below for a simple, smooth and flawless final product.
What You Need:
Before you get started, make sure you have the following:
Masking tape
Scissors
Squeegee
Lint-free Cloth
Ruler / Measuring tape
Preparation:
In order to make the application process as easy as possible, it’s important to perform the following steps beforehand.
Flatten It Out: When you receive your graphics delivery, Remove the rolled up decals from the tube carefully and let the decals unroll naturally in a clean flat surface area that’s room temperature. Always avoid folding or wrinkling the decals. Do not expose the adhesive until you are ready to install the graphic immediately. To avoid any damage, be sure to install the decals within a year after receiving it.
Avoid Installing During High Winds And Extreme Temperatures: If you have to install the decal outside, wait for a day that has little to no wind. Also, avoid applying it during extreme cold or extreme heat. The application temperature should be above 50 F (13 C)
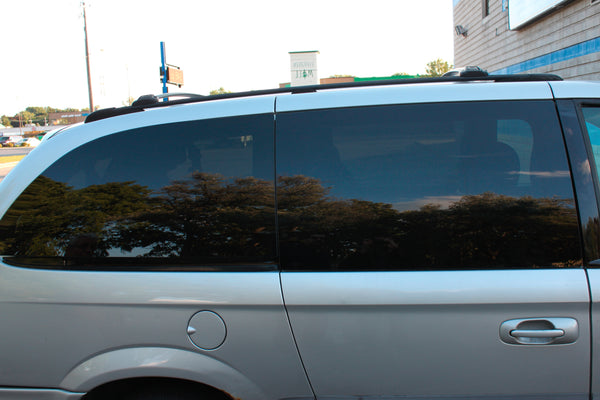
Apply To A Clean Surface: Wash the surface of the vehicle thoroughly before you begin. Wipe down the surface, rinsing with clean water often. Do not use any chemical products. These can contain harsh chemicals that can impact the decal.
Dry Surface & Wipe With Rubbing Alcohol: After cleaning, dry the surface of the vehicle thoroughly with a clean, lint-free towel. Any lingering moisture can impact the decal. For freshly painted surfaces, wait a minimum of two weeks before applying the decal. For boats wait a minimum of two days after installation before you take your boat to the water.
Applying Decal:
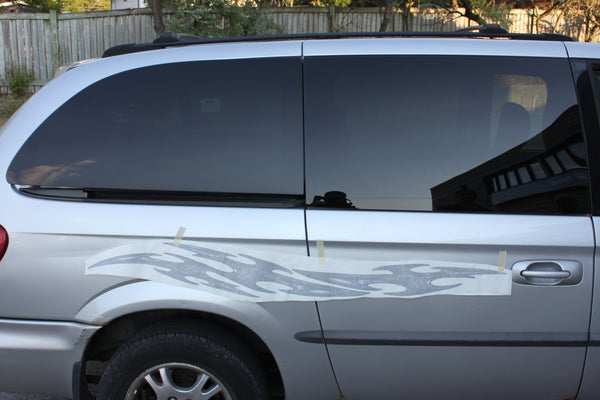
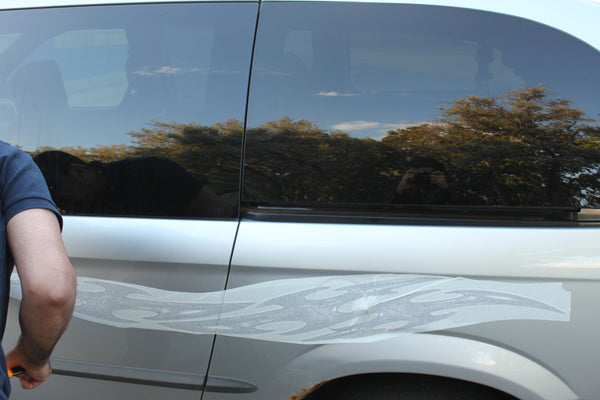
Measure And Position Graphic Decal: Leave the backing on the graphic decal and measure the application area twice to ensure it’s correct. Once you are confident in the measurement, to position the graphic , leaving the backing paper on. Do not remove the Backing paper at this point. Use small pieces of masking tape to apply to the corners of the graphic to hold it in place temporarily. Avoid installing the product on any severely curved edges of the vehicle, or rubber areas since the adhesive will not stick well to these areas.
Create A Hinge With Masking Tape: Apply a long piece of masking tape vertically from top to bottom, approximately 4-5 inches above and below the graphic. This will hold the decal in place as you remove the backing paper, starting with just the one half. We recommend you start with the half close to the front side of the vehicle.
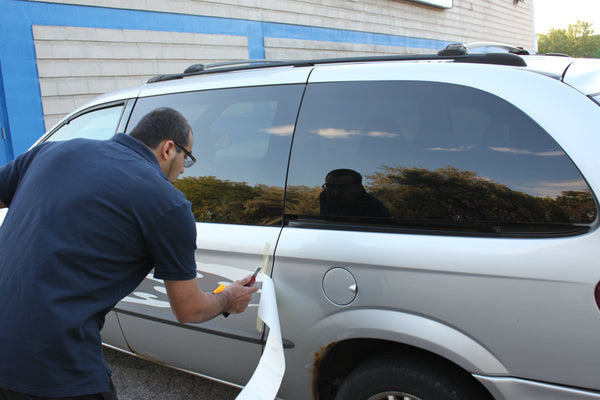
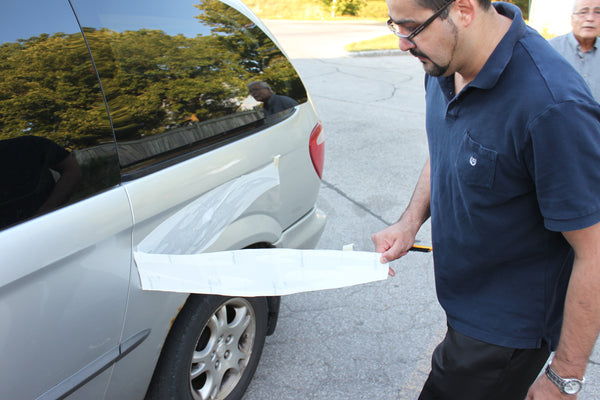
Remove The Smaller Pieces Of Tape: Starting on one side of the graphic closest to the front of the vehicle , remove the small pieces of tape and lift the graphic away from the surface. Keep peeling the backing paper off until you reach the center of the graphic where the piece of “hinge” tape is. At this point, the graphic should still be attached to the application tape, but the adhesive on backing paper side should be exposed.
Cut Backing Paper At Center: Hold the application tape (and graphics) away from the car and use scissors to cut the backing paper as close as possible to the center. Ensure there are no wrinkles so far on the decal or application tape.
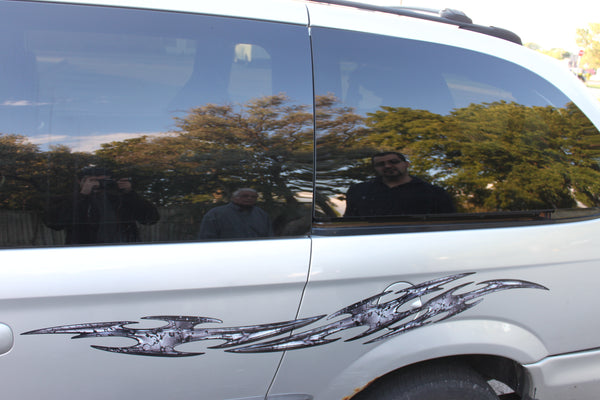
Squeegee Decal To The Vehicle:Now you’re ready to squeegee the decal fully. Start at the center of the decal and work your way to the end. With the application tape still in place and with the adhesive exposed, squeegee the decal to the surface of the vehicle. Use firm pressure and even strokes, holding it at a 45-degree angle to ensure a smooth, wrinkle-free result. Perform the same steps for the other side of the graphic.
Squeegee Entire Decal Again: With the application tape still in place, go over the decal a second time and cover the entire surface with the squeegee, starting from the middle and moving outwards, smoothing it down.
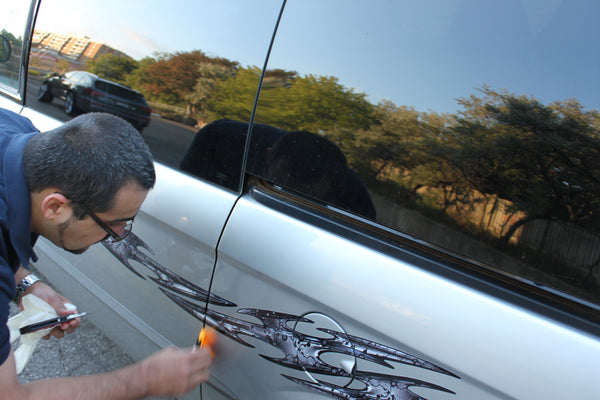
Carefully Peel Application Tape Off: Starting at the top right corner, slowly remove the application tape at a 45-degree angle. If you notice an area lifting, stop and use your thumb to press it back down. Then go over it with the squeegee.
Final Smoothing: At this point, it’s normal to notice a few air bubbles which can be removed with your thumb by putting pressure and pushing the bubbles to the edge of the decal. If you notice any wrinkles no worry you can heat up the vinyl using a heat gun or a blow dryer and carefully peel and reposition the affected area free of wrinkles.
If you have questions give us a call or email us will get back to you right away with the proper advice.
Aftercare Tips:
To keep your graphics looking great for years to come, avoid using any high pressured or automated car washers and harsh chemicals on your vehicle. Hand-washing your vehicle is best.
Avoid contact with gasoline, aromatic solvents, carnauba-based wax or any other harsh items on or around the decal. If any chemicals or fuel lands on the decal, rinse it with water immediately.
And finally, to get the maximum lifespan out of your graphic, cover it up whenever possible, away from the sun and heat.
See Orafol’s advice on maintenance of your vehicle graphics:
For installing vinyl cut decals using the wet method, follow the instructions above, but mix a water and soap mix in a spray bottle and spray the surface of the vehicle and the adhesive side of the decals when you remove the backing. When your squeegee the decals with the application mask, make sure to get all of the water out and wait for the water to evaporate before you remove the application mask.